The irresistible aroma of freshly popped popcorn, enhanced by a rich, golden caramel coating, is a treat many aspire to create at home. But for those with a dedicated popcorn machine, the question often arises: how do you achieve that perfectly crunchy, evenly coated caramel popcorn without the mess and guesswork of stovetop methods? As a seasoned technician with over a decade of experience with everything from compact home poppers to intricate commercial systems, I know the nuances of these machines and the desires of popcorn enthusiasts. This guide is crafted to help you unlock the full potential of your popcorn maker, transforming simple kernels into gourmet caramel masterpieces every time.
Understanding Your Machine for Caramel Popcorn Success
Before diving into recipes, it’s crucial to understand how different popcorn machines can be leveraged for caramel popcorn. While a basic hot air popper can provide the base popped corn, machines with a stirring mechanism or dedicated coating capabilities offer a significant advantage for achieving that coveted, even caramel embrace.
Theater-Style Popcorn Machines with Kettles
|
Our Picks for the Best Popcorn maker in 2026
As an Amazon Associate I earn from qualifying purchases.
|
||
| Num | Product | Action |
|---|---|---|
| 1 | West Bend Stir Crazy Hot Oil Popcorn Popper, Popcorn Maker Machine with Large Serving Bowl Lid and Stirring Rod Perfect for Movie Night Snack Time or Parties, 6-Quart, Red |

|
| 2 | Dash Fresh Pop Popcorn Maker - Oil-Free, Air Popcorn Popper - With Measuring Cup & Recipe Guide - Perfect for Movie Nights - 16 Cups, White |
|
| 3 | Dash Fresh Pop Popcorn Maker - Oil-Free, Air Popcorn Popper - With Measuring Cup & Recipe Guide - Perfect for Movie Nights - 16 Cups, Aqua |
|
| 4 | Original Whirley Pop Popcorn Maker - Wabash Valley Farms Gourmet Popcorn Popper, Aluminum Pot With Nylon Gears, 3-Minute Stove Top Popper, Home Movie Night (Silver) |
|
| 5 | Presto 04863 Poplite Hot Air Popcorn Popper - Built-In Measuring Cup + Melts Butter, Easy to Clean, Built-In Cord Wrap, 18 Cups, Red |
|
| 6 | Hot Air Popper Popcorn Maker, 1200W Popcorn Machine, 4.5-Quart Air Popper for Family Movie Nights, Popcorn Popper, Fast 2-Min Popcorn Maker Machine, Popcorn Popper |
|
| 7 | Dash SmartStore Deluxe Stirring Popcorn Maker - Hot Oil Electric Popcorn Popper with Butter-Warming Tray, Clear Serving Bowl, Storage Lid & Measuring Cup - 24 Cups, Red |
|
| 8 | VEVOR Commercial Popcorn Machine, 8 Oz Kettle, 850 W Countertop Popcorn Maker for 48 Cups per Batch, Theater Style Popper with 3-Switch Control Steel Frame Tempered Glass Doors 2 Scoops 2 Spoons, Red |
|
| 9 |
|
|
| 10 | Black Vintage Commercial Popcorn Machine with Cart & Warmer Light - 12oz Stainless Steel Popper Makes 60 Cups for Theater, Parties & Home Use |
|
These machines typically feature a heated kettle with an integrated stirrer. While primarily designed for popping, many models can also be used to mix in a pre-made caramel glaze or even to coat pre-popped corn with a freshly prepared sauce. The stirrer is key here, ensuring the caramel is distributed uniformly across all kernels.
Dedicated Caramelizers and Coaters
For the serious enthusiast or small commercial operator, dedicated caramelizing machines are game-changers. These units are designed specifically to coat large batches of popcorn with caramel, often featuring powerful mixers, temperature controls for the caramel itself, and even cooling trays. They ensure every piece is perfectly enrobed and crunchy. Some advanced machines, like the American ball-shaped caramel popcorn machine, combine the popping kettle and a caramel coating pot, ensuring a seamless, high-efficiency process from kernel to coated snack.
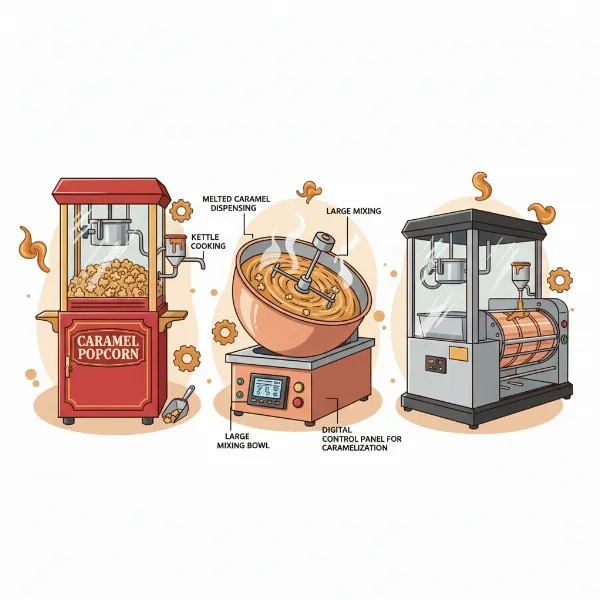 Different types of popcorn machines, including theater-style and dedicated caramelizers, for making caramel popcorn.
The Role of the Stirrer
Regardless of your machine type, a stirring mechanism is paramount when making caramel popcorn in a machine. It prevents clumping, ensures even heat distribution (if making caramel in the kettle), and most importantly, guarantees that each popcorn kernel gets its fair share of the delicious caramel coating. Without it, you’re likely to end up with unevenly coated popcorn or burnt sugar.
The Sweet Science of Caramel: What Makes It Magic?
Caramel is more than just melted sugar; it’s a chemical transformation. When sugar is heated, it undergoes a process called caramelization, breaking down and forming new compounds that give it its distinctive golden-brown color and rich, complex flavor. Understanding this process helps in controlling the heat and timing, critical factors in preventing burnt sugar and achieving a smooth, delectable caramel. Adding ingredients like butter and baking soda (in homemade recipes) further refines the texture and flavor, with baking soda creating tiny air bubbles that make the caramel softer and easier to bite.
Essential Ingredients for Perfect Caramel Popcorn
The quality of your ingredients directly impacts the final taste and texture. Choose wisely for an exceptional caramel popcorn experience.
- Popcorn Kernels:
- Mushroom Kernels: These pop into a round, dense shape, ideal for caramel popcorn as they hold up well to coating and baking without crumbling.
- Butterfly Kernels: These are the classic irregular shapes, often preferred for movie theater popcorn. While they can be used, their delicate wings might break off more easily when coated.
- Popping Oil (if applicable): Use a high smoke point oil like coconut oil, corn oil, or canola oil. The right amount is crucial for popping efficiency and flavor.
- Caramel Glaze/Mix (Pre-made Option): Products like “Glaze Pop” are popular and simplify the process. They often contain sugar, corn syrup solids, and flavoring, designed to be added directly to the popping kettle.
- For Homemade Caramel Sauce (From Scratch Option):
- Granulated Sugar: The base of your caramel.
- Brown Sugar: Adds depth and a molasses-like flavor.
- Unsalted Butter: Essential for richness and a smooth texture.
- Light Corn Syrup: Helps prevent crystallization, ensuring a smooth caramel.
- Salt: Balances the sweetness and enhances flavor.
- Vanilla Extract: Adds a warm, aromatic finish.
- Baking Soda: Reacts with the acid in the caramel to create a lighter, more pourable texture, and helps prevent the caramel from becoming rock-hard.
Method 1: Using a Pre-Made Caramel Glaze (The Easiest Approach)
This method is fantastic for home theater-style popcorn machines, offering simplicity and consistent results.
- Prepare Your Machine: Ensure your popcorn machine kettle is clean and ready. Turn on the heat to allow it to preheat slightly.
- Add Popping Ingredients:
- Pour your popping oil into the kettle.
- Add your popcorn kernels.
- Introduce the pre-made caramel glaze mix directly into the kettle along with the kernels and oil. The amount of glaze mix will typically be about half the volume of your kernels, but always check the product’s specific instructions.
- Pop and Coat:
- Close the kettle lid and turn on the stirrer motor.
- Allow the kernels to pop. As they pop, the heat from the kettle will melt the caramel glaze, and the stirring arm will coat each kernel as it expands.
- Listen for the popping to slow significantly (to about 1-2 seconds between pops).
- Discharge and Cool:
- Carefully tilt the kettle to dump the freshly popped and coated caramel popcorn into the warming tray or a large cooling bin.
- Spread the popcorn out quickly to prevent it from clumping as it cools. Stir and separate it gently for about 10-15 minutes until it’s cool and crisp.
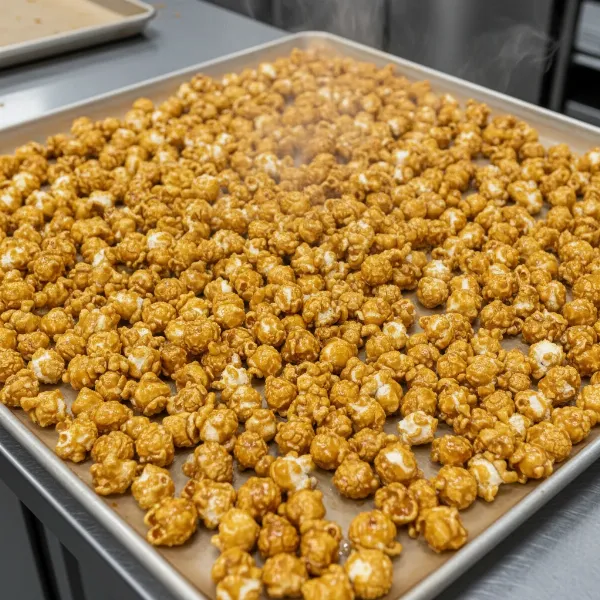 Freshly coated caramel popcorn spreading out on a cooling tray to prevent clumping.
“For the easiest and most consistent caramel popcorn with a machine, a high-quality pre-made caramel glaze is often the secret weapon. It eliminates the fuss of making sauce from scratch while still delivering that classic sweet crunch.” – Alex Pham, Popcorn Machine Technician
Method 2: Crafting Caramel Popcorn with Homemade Sauce (For Dedicated Coaters or Adaptable Machines)
This method allows for greater customization of flavor and texture, ideal for those with a dedicated caramelizer or who want to adapt a larger, robust popcorn machine for coating.
Step 1: Pop the Popcorn
First, you’ll need a batch of plain, perfectly popped popcorn.
- Pop Kernels in Your Machine: Using your popcorn machine, pop your desired amount of mushroom-style kernels with oil (if it’s a kettle-style popper) or use an air popper for oil-free popcorn.
- Prepare for Coating: Once popped, immediately transfer the popcorn to a large, heat-resistant bowl or your machine’s coater/mixing chamber if it has one. Keep it warm if possible while you make the caramel.
Step 2: Prepare the Homemade Caramel Sauce
This sauce will be made separately and then combined with the popcorn.
- Combine Ingredients: In a heavy-bottomed saucepan, combine granulated sugar, brown sugar, corn syrup, butter, and salt.
- Cook the Caramel: Heat the mixture over medium heat, stirring occasionally, until the butter is melted and the sugar is dissolved. Bring it to a boil without stirring, and let it cook until it reaches a specific temperature (usually between 240-250°F or 115-121°C on a candy thermometer). The longer you cook it, the harder the caramel will be when cooled.
- Add Vanilla and Baking Soda: Remove from heat. Stir in vanilla extract, then quickly stir in baking soda. The mixture will foam up vigorously, which is normal – the baking soda helps create a lighter, softer caramel texture.
Step 3: Coating the Popcorn
This is where your machine’s mixing capabilities truly shine.
- Introduce Caramel to Popcorn: If using a dedicated caramelizer or a large popcorn machine with a mixing function:
- Ensure your popped popcorn is in the mixing chamber.
- Slowly pour the hot caramel sauce over the popcorn while the machine’s mixer is running. The mixer will gently tumble the popcorn, ensuring an even coating.
- Continue mixing for several minutes until all the popcorn is thoroughly coated.
- Manual Coating (if machine lacks a coater): If your popcorn machine doesn’t have a coating function, you’ll need to transfer the popped corn to a very large, sturdy bowl. Pour the caramel over the popcorn and mix thoroughly with a large spoon or spatula until evenly coated. This method requires more manual effort but is still effective.
- Spread and Cool: Once coated, quickly spread the caramel popcorn onto parchment-lined baking sheets. You can optionally bake it at a low temperature (e.g., 250°F / 120°C) for 45-60 minutes, stirring occasionally, to achieve an extra-crispy texture and prevent stickiness. This step is less crucial if your machine achieved good, even coating and rapid cooling.
- Separate and Store: Allow the caramel popcorn to cool completely. Break apart any clumps before storing it in an airtight container.
Tips from a Pro: Achieving Caramel Popcorn Perfection
Even with the best machine, a few professional insights can elevate your caramel popcorn from good to truly legendary.
Even Coating is Key
The goal is for every single kernel to be enrobed in caramel.
- Pre-made Glaze: Ensure the kettle’s stirrer is functioning optimally and don’t overload the kettle, as this can hinder even distribution.
- Homemade Sauce: Pour the caramel slowly and evenly over the popcorn while mixing. A consistent, steady mixing action by your machine’s coater is crucial.
Preventing Sticking and Clumping
Caramel popcorn can be notoriously sticky.
- Oil Spray: Lightly spray your cooling trays or baking sheets with a non-stick cooking spray before spreading the popcorn.
- Cooling Time: Allow adequate cooling time on a flat surface, spreading the popcorn thin. Don’t rush this step.
- Baking Soda: In homemade caramel, baking soda creates a softer, less sticky caramel that coats better and is easier to separate.
Mastering Temperature Control
Precision in temperature is vital for caramel.
- For Glaze Mixes: Follow your machine’s recommended operating temperature for popping. The glaze will melt and coat as the popcorn pops.
- For Homemade Caramel: Use a reliable candy thermometer. Overcooking leads to brittle, potentially burnt caramel, while undercooking results in a soft, overly sticky coating.
Ingredient Quality Matters
Don’t skimp on your ingredients. High-quality kernels will yield fewer unpopped “old maids,” and fresh butter and good quality sugars will provide superior flavor.
Storage for Lasting Crispness
Store your caramel popcorn in an airtight container at room temperature. Exposure to air will quickly make it soft and chewy. For optimal freshness and crunch, consume within 3-5 days.
Machine Maintenance and Cleaning
Caramel is notoriously sticky. Clean your machine immediately after use, while it’s still warm, to prevent caramel from hardening and becoming difficult to remove. Refer to your machine’s manual for specific cleaning instructions. For kettles, a little hot water and letting it soak for a bit can work wonders.
Troubleshooting Common Caramel Popcorn Woes
Even seasoned pros encounter challenges. Here’s how to tackle them:
- Burnt Caramel: This often happens due to excessive heat or cooking the caramel for too long. For homemade sauce, monitor the temperature closely with a thermometer. For glaze mixes in the kettle, ensure you’re not exceeding the machine’s recommended temperature or batch size.
- Sticky/Soft Popcorn: If your caramel popcorn isn’t as crisp as you’d like, it might be due to humidity, insufficient cooling, or an undercooked homemade caramel sauce. Baking coated popcorn at a low temperature for 30-60 minutes can often resolve this. Ensure it’s fully cooled before storing.
- Uneven Coating: The most common culprit here is a lack of adequate mixing or an overloaded machine. Always ensure your machine’s stirrer is engaged and functioning correctly. For homemade sauce, pour slowly and ensure continuous agitation.
Conclusion
Creating delectable caramel popcorn using your machine is a rewarding experience that combines the joy of fresh popcorn with the irresistible sweetness of caramel. Whether you opt for the convenience of a pre-made glaze or the customizability of a homemade sauce, understanding your machine’s capabilities and following these expert tips will lead to consistently perfect results. From theater-style poppers to dedicated caramelizers, your machine is a powerful tool in your culinary arsenal. So go ahead, experiment, and delight your family and friends with a truly professional-grade caramel popcorn that everyone will rave about.
What’s your favorite secret ingredient for making caramel popcorn truly stand out?
Frequently Asked Questions
What type of popcorn machine is best for making caramel popcorn?
Theater-style popcorn machines with a built-in stirrer are excellent for using pre-made caramel glazes, as the stirrer ensures even coating during popping. For making caramel sauce from scratch and coating, a dedicated caramelizer or a robust commercial-style popcorn machine with a powerful mixing function is ideal for achieving professional results.
Can I make caramel popcorn in an air popper?
Yes, but with an extra step. An air popper can provide the plain popped popcorn. You would then need to make the caramel sauce separately on the stovetop and manually coat the air-popped corn in a large bowl, mixing thoroughly, before spreading it out to cool and crisp. An air popper alone cannot coat the popcorn.
How do I prevent my caramel popcorn from getting too sticky?
To prevent stickiness, ensure your homemade caramel sauce is cooked to the correct temperature (around 240-250°F for a firm but chewy caramel), and add baking soda at the end, which helps lighten the texture. After coating, spreading the popcorn thinly on parchment paper to cool completely, or even baking it at a low temperature, will significantly reduce stickiness and improve crispness.
What’s the difference between mushroom and butterfly kernels for caramel popcorn?
Mushroom kernels pop into a denser, rounder shape that handles the heavy caramel coating better without breaking. Butterfly kernels have irregular “wings” that are more fragile and can snap off, leading to more crumbs and less uniform coating. For caramel popcorn, mushroom kernels are generally preferred for their robust shape.