Imagine the frustration: your clothes are still damp after a dryer cycle, your shower water is icy cold, or your oven refuses to heat up. More often than not, a broken heating element is the culprit behind these common household appliance woes. While the thought of a DIY repair might seem daunting, replacing a faulty heating element is a manageable project for many homeowners, potentially saving you significant time and money compared to calling a professional. This guide will walk you through everything you need to know, from understanding why elements fail to a step-by-step replacement process, ensuring you can restore warmth and functionality to your essential appliances.
Understanding Your Heating Element
A heating element is the unsung hero of many household appliances, responsible for converting electrical energy into heat. Typically made from high-resistance materials like nichrome or stainless steel, these components become hot when an electric current passes through them, transferring that heat to air, water, or cooking surfaces. Without a functional heating element, your dryer can’t dry, your water heater can’t heat, and your oven can’t bake.
Common signs of a broken heating element often include a complete lack of heat, significantly reduced heat output, or inconsistent heating from the appliance. You might also notice clothes taking unusually long to dry or water that never quite reaches the desired temperature. Over time, heating elements can fail due to excessive heat, physical stress, or corrosion from exposure to moisture, leading to decreased performance or complete breakage.
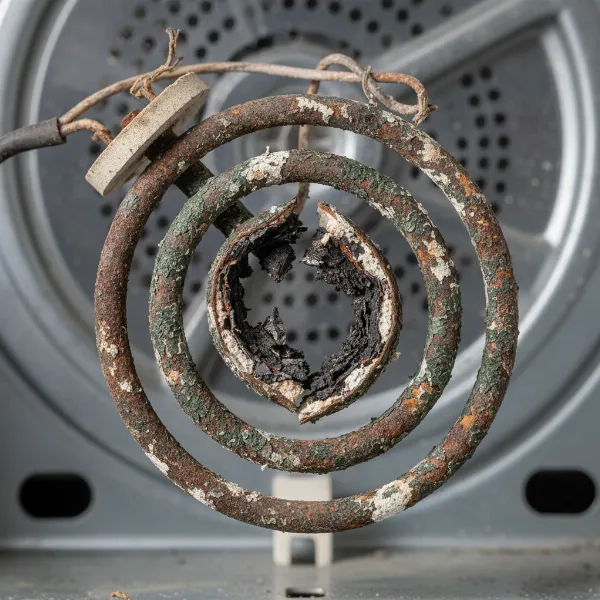 Close-up of a visibly broken, burnt-out heating element from a common household appliance.
Repair vs. Replacement: What You Need to Know
When a heating element breaks, the term “repair” can be misleading. While some might consider attempting to splice a broken heating coil back together with fine wire or a terminal, this is generally a temporary and often dangerous fix. The material of heating elements, like nichrome, is specifically designed for high heat and electrical resistance, which standard wires like copper or aluminum cannot safely replicate. Attempting such a splice can lead to hot spots, insufficient heat output, premature failure, or even a fire hazard.
For these reasons, replacement is overwhelmingly the recommended and safest DIY solution for a broken heating element. Rather than trying to mend a fractured coil, the process involves safely removing the old, defunct element and installing a new, compatible one. This approach ensures proper functionality, extends the life of your appliance, and, most importantly, maintains safety standards. Opting for a full replacement avoids the inherent risks of makeshift repairs and provides a lasting solution.
Types of Appliances and Heating Elements
Heating elements are integral to a wide range of appliances, each with its own design and accessibility. While the core function remains the same, the specific element and replacement procedure will vary slightly depending on the appliance. Understanding these distinctions is crucial for a successful DIY project.
For instance, a dryer heating element often consists of a long, coiled nichrome wire housed within a metal chamber. Accessing it typically requires removing the back panel of the dryer. Water heater heating elements are immersion-type, directly submerged in the water tank, necessitating draining the tank before replacement. Oven and stove heating elements can be either exposed coiled elements inside the oven cavity or concealed underneath the oven floor or stove cooktop. While the specific part and access points differ, the fundamental steps of disconnecting power, accessing, removing, and installing apply across the board.
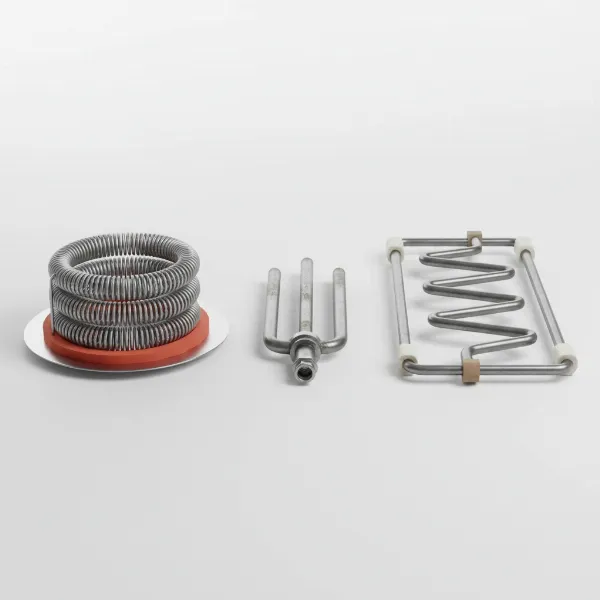 Collection of different heating elements from various household appliances, highlighting diverse designs.
| Appliance | Typical Element Type | Key Replacement Consideration |
|---|---|---|
| Dryer | Coiled Nichrome | Access from back or front, lint removal |
| Water Heater | Immersion, sheathed | Draining tank, shutting off water supply |
| Oven/Stove | Sheathed, exposed/concealed | Access panels, careful handling of wiring |
| Dishwasher | Sheathed, bottom-mounted | Draining water, seal integrity |
Preparing for Your DIY Heating Element Replacement
Before you even think about grabbing a screwdriver, thorough preparation is paramount. This phase ensures your safety, streamlines the replacement process, and helps prevent unexpected complications. Remember, working with electricity and potentially water or gas requires a methodical approach.
Safety First: Essential Precautions
|
Our Picks for the Best Popcorn maker in 2026
As an Amazon Associate I earn from qualifying purchases.
|
||
| Num | Product | Action |
|---|---|---|
| 1 | Original Whirley Pop Popcorn Maker - Wabash Valley Farms Gourmet Popcorn Popper, Aluminum Pot With Nylon Gears, 3-Minute Stove Top Popper, Home Movie Night (Silver) |

|
| 2 | Dash Fresh Pop Popcorn Maker - Oil-Free, Air Popcorn Popper - With Measuring Cup & Recipe Guide - Perfect for Movie Nights - 16 Cups, White |
|
| 3 | Presto 04863 Poplite Hot Air Popcorn Popper - Built-In Measuring Cup + Melts Butter, Easy to Clean, Built-In Cord Wrap, 18 Cups, Red |
|
| 4 | West Bend Stir Crazy Hot Oil Popcorn Popper, Popcorn Maker Machine with Large Serving Bowl Lid and Stirring Rod Perfect for Movie Night Snack Time or Parties, 6-Quart, Red |
|
| 5 | Hot Air Popper Popcorn Maker, 1200W Popcorn Machine, 4.5-Quart Air Popper for Family Movie Nights, Popcorn Popper, Fast 2-Min Popcorn Maker Machine, Popcorn Popper |
|
| 6 | Dash SmartStore Deluxe Stirring Popcorn Maker - Hot Oil Electric Popcorn Popper with Butter-Warming Tray, Clear Serving Bowl, Storage Lid & Measuring Cup - 24 Cups, Red |
|
| 7 | Dash Fresh Pop Popcorn Maker - Oil-Free, Air Popcorn Popper - With Measuring Cup & Recipe Guide - Perfect for Movie Nights - 16 Cups, Aqua |
|
| 8 | VEVOR Commercial Popcorn Machine, 8 Oz Kettle, 850 W Countertop Popcorn Maker for 48 Cups per Batch, Theater Style Popper with 3-Switch Control Steel Frame Tempered Glass Doors 2 Scoops 2 Spoons, Red |
|
| 9 | Black Vintage Commercial Popcorn Machine with Cart & Warmer Light - 12oz Stainless Steel Popper Makes 60 Cups for Theater, Parties & Home Use |
|
| 10 | Dash Fresh Pop Popcorn Maker - Oil-Free, Air Popcorn Popper - With Measuring Cup & Recipe Guide - Perfect for Movie Nights - 16 Cups, Red |
|
Safety is non-negotiable when undertaking appliance repairs. Always disconnect the power supply to the appliance by unplugging it from the wall or flipping the corresponding circuit breaker. For water heaters, turn off both the electricity and the water supply valve, and for gas appliances, shut off the gas supply. Wearing insulated gloves and safety goggles is also recommended to protect against electrical shocks or debris. Ensure you are working in a well-ventilventilated area, especially if dealing with older appliances that might emit fumes.
Tools and Materials You’ll Need
Having the right tools on hand will make the job much smoother. Here’s a typical list:
- Screwdrivers: Phillips and flathead, various sizes.
- Multimeter: Essential for testing continuity and resistance, confirming the element is faulty, and ensuring power is off.
- New Heating Element: Crucially, this must be the correct part for your specific appliance model.
- Pliers or Adjustable Wrench: For gripping, manipulating wires, or unscrewing the element (especially for water heaters).
- Wire Cutters/Strippers: If any wire repairs are needed.
- Teflon Tape (Plumber’s Tape): Necessary for water heater elements to create a watertight seal.
- Work Light/Headlamp: To illuminate tight spaces.
- Camera or Smartphone: To take photos of wiring configurations before disconnecting.
- Insulated Gloves: For electrical safety.
Finding the Right Replacement Part
The success of your DIY repair hinges on obtaining the correct replacement heating element. Always refer to your appliance’s model number, typically found on a label inside the door, on the back, or under the unit. Use this number when purchasing the new element. While aftermarket parts can be cheaper, OEM (Original Equipment Manufacturer) parts often offer better compatibility and longevity. Double-check specifications and reviews to ensure you’re getting a reliable component.
Step-by-Step Guide: Replacing a Broken Heating Element
This general guide covers the most common steps involved in replacing a heating element. Always consult your appliance’s specific service manual for detailed instructions and diagrams.
Step 1: Disconnect Power (and Water/Gas)
Before touching anything, turn off the power to the appliance. Unplug it or switch off the circuit breaker. For water heaters, also turn off the cold water supply valve leading into the unit and, if applicable, the gas supply. Confirm there is no voltage present at the element’s terminals using your multimeter.
Step 2: Access the Heating Element
Depending on your appliance, you’ll need to remove access panels or covers. For dryers, this might mean unscrewing and removing the back panel. For water heaters, locate and remove the smaller access panels on the side of the tank. For ovens, the element might be visible or require removing floor panels. Take photos as you go to remember screw locations and panel orientations.
Step 3: Disconnect Wires and Test (Optional, but Recommended)
Carefully disconnect the wires from the terminals of the old heating element. Take a clear photograph before disconnecting to ensure correct reattachment. This is also an excellent opportunity to test the old element with your multimeter for continuity and resistance to confirm it’s indeed faulty. A lack of continuity or an incorrect resistance reading will confirm the element is broken.
Step 4: Remove the Old Heating Element
Once wires are disconnected, proceed to remove the element itself. For dryers, it usually slides out after removing a few mounting screws. For water heaters, use a pipe wrench to carefully unscrew the element from the tank. Ovens typically involve unscrewing mounting brackets. Note the orientation of the old element to ensure the new one is installed correctly.
Step 5: Install the New Heating Element
Carefully insert the new heating element into its housing. For water heaters, apply Teflon tape clockwise around the threads of the new element to create a watertight seal before screwing it in. Align it with the mounting holes or threads and secure it firmly. Do not overtighten, but ensure it’s snug.
Step 6: Reconnect Wires
Refer to the photos you took earlier and securely reattach the wires to the terminals of the new heating element. Ensure connections are tight and there’s no exposed wiring that could short circuit.
Step 7: Reassemble and Restore Utilities
Replace all access panels and covers, securing them with their original screws. Once the appliance is fully reassembled, restore power at the circuit breaker or by plugging it back in. For water heaters, turn the water supply back on and allow the tank to fill completely before restoring power. For gas appliances, restore the gas supply.
Step 8: Test the New Heating Element
Turn on the appliance and test its functionality. For dryers, run a short, unheated cycle to check for proper operation, then a heated one. For water heaters, check for leaks around the new element and then turn on a hot water faucet to purge air from the system. You should soon have hot water. For ovens, set it to a moderate temperature and observe if it heats up correctly.
“A common mistake DIYers make is neglecting to take clear photos of wiring before disconnecting. This simple step can save immense frustration during reassembly.” – John Smith, Master Appliance Technician
Important Considerations for Different Appliances
While the general steps apply, specific appliances have unique considerations:
- Dryers: Before reassembling, take the opportunity to thoroughly clean out any lint accumulated in the element housing and dryer vents. Excessive lint is a common cause of element failure and a fire hazard.
- Water Heaters: After draining, flushing the tank of sediment can improve efficiency and extend the life of the new element. Also, consider inspecting and replacing the anode rod if it’s heavily corroded, as it protects the tank from rust.
- Ovens: Handle exposed oven elements with care, as they can be brittle. After replacement, you might need to recalibrate your oven’s temperature if you notice inconsistencies.
Conclusion
Replacing a broken heating element in your household appliance is a highly achievable DIY project that can restore convenience and save you money. By understanding the role of heating elements, recognizing the signs of failure, and adhering to strict safety protocols, you empower yourself to tackle common appliance issues. Remember that while a quick patch might seem appealing, a complete replacement is the safer, more reliable, and ultimately more effective long-term solution. Always ensure you have the correct replacement part and the right tools, and don’t hesitate to consult your appliance’s manual or a professional if you encounter any uncertainty. With patience and attention to detail, you’ll have your appliance heating effectively again.
Ready to take on your next DIY challenge? Which appliance will you fix first?
Frequently Asked Questions
How do I know if my heating element is broken?
The most common signs include your appliance not heating at all, heating too slowly, or inconsistent heating. For a definitive diagnosis, use a multimeter to test the element for continuity; a lack of continuity confirms a break in the circuit, indicating a broken element.
Is it safe to replace a heating element myself?
Yes, replacing a heating element can be a safe DIY task if you follow all safety precautions diligently. Always disconnect power, wear protective gear, and use the correct tools. If at any point you feel uncomfortable or uncertain, it is always best to consult a professional.
How long does a heating element typically last?
The lifespan of a heating element varies significantly depending on the appliance, usage frequency, and quality of the component, but generally ranges from 5 to 15 years. Regular cleaning and preventative maintenance can help extend its operational life.
What is a nichrome wire?
Nichrome is an alloy primarily composed of nickel and chromium, known for its high electrical resistance and ability to withstand high temperatures without oxidizing. These properties make it an ideal material for heating elements in many electrical appliances.